Easy mobile prototyping with Pixate
I’ve been looking recently into playing a little bit more with new tools meant for digital designers like myself. Don’t get me wrong, I am perfectly happy with my Illustrator/Visio/Flash combo for all my UI/Workflows/Prototyping needs, but I figured it’s always good to keep your eyes open for new toys. So long story short, while browsing through Google’s Design Blog I came across Pixate (since apparently they were recently acquired by Google) a fairly new prototyping tool for mobile (Android and iOS) which seemed worth a try.
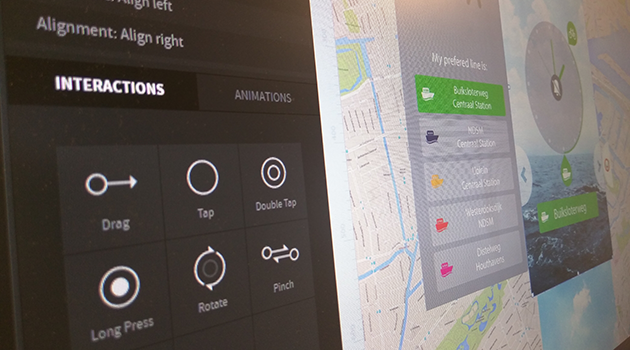
Pixate is a pretty simple tool that allows you to import graphical assets (such as screens, icons, and other UI elements) and then assign interactions and/or animations to them (such as taps, swipes and scaling), to create transitions and flows between the different screens and states of your app. The beautiful thing about Pixate, is that you can test your prototype directly on you mobile device with very little effort, as if it was a native app.
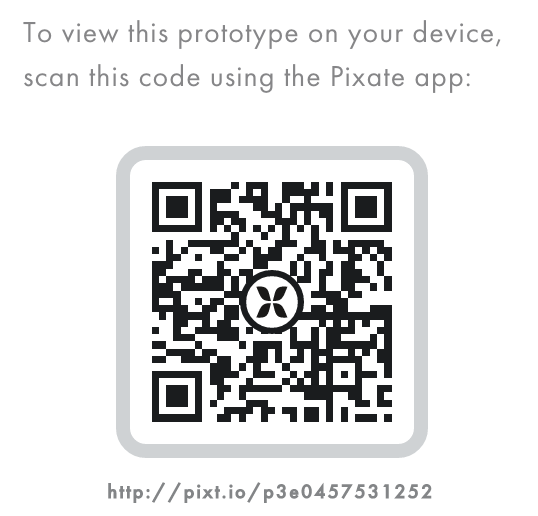
Google has made Pixate Studio free of charge, which means you can create all the prototypes you want for your own internal testing. Awesome news! If you want the ability to share your prototypes online via a link or QR code, you will have to pay a subscription though.
I figured the best way of giving the tool a try would be to create a prototype of Pontual, a ferry catching app I worked on in the past, which meant I had all my assets ready to go. And I could then share my experience with it here.
Starting off was a bit tricky though, as Pixate’s interface looks so simple, that you imagine you can just learn it by clicking around a little bit on one of the various samples that come with it. Unfortunately this was not the case, as you need to learn a bit of the principles behind it before you can make any real progress. Luckily for us, Pixate has created a nice library of tutorials and videos that explain all the basics, and an array of downloadable examples for you to play around with and learn as you fiddle with them.
Pixate doesn’t really offer the possibility to create assets of any kind within it, so if you need a text for example, you’re gonna need to create an image out of it and import it. Given that it’s such a “young” tool, it’s understandable that some features are not there yet, and the developers say that this kind of functionality is in the pipeline, which will be a welcome addition. Still, you will have to keep in mind that EVERYTHING you want in your prototype will have to be created somewhere else and imported into the stage.
So you import assets, you place them on the stage and you start assigning interactions and/or animations to them. For instance, if you want a button to trigger a menu sliding in from the side, you add a “tap” interaction to the button asset and you add an “animation” to the menu asset, telling it to slide in when the button is tapped. By assigning animations to other assets which are also triggered by tapping the same button, you can create more advanced changes in your app’s state.
Being used to prototyping in Flash, which has the possibility to add events and animations based on timelines, made it a bit tricky for me to better grasp the idea behind Pixate, which does not allow you to manage assets based on “current” and “desired” states by placing both of these in a timeline and creating a “transition” between them. So for instance, if you want that menu to slide in as I mentioned, you need to place it in the original position, off screen, and in the “animation” event describe that it should slide to a certain position given by pixel coordinates. This of course, does not allow you to directly visualize the end state on the stage as you work, so you have to know exactly your coordinates before starting. It is not a bad thing on it’s own, it just means that you have to know exactly how your assets should be positioned, for all states, before hand.
Another unfortunate omission in the functionality (which I’m sure it’s in the highest priority of requested features) is support for animated assets (be it video, multiple frames or GIFs) which could be very handy for things like animated loading icons.
All in all, I was kind of sceptical about how overly simplistic the options seemed to be, and whether or not I would be able to create a full high quality prototype with it, or would have to concentrate on separate individual interactions and transitions. But once I got the hang of the principles, Pixate turned out to be a very powerful tool that allows you to take advantage of a whole bunch of standard interactions and animations out of the box, which if used and combined smartly, can actually produce quite elaborate prototypes that can be tested DIRECTLY on your mobile device, and that is a great selling point for the tool. It even allows you to prototype and test directly on Android Wear and Apple Watch!
For more advanced functionality I will probably still stick to Flash, as it provides me with a more robust scripting environment in which I can basically just program a full application that can load data, play audio/video on demand, and in general deal with more complex interactions and functionality. Yet, if we stick to the actual goal of using prototypes to quickly test your vision, flow and interactions without necessarily having all as working functionality, then Pixate is a really fantastic tool.
PROS:
- Free!
- Simple and user friendly
- Changes you make become IMMEDIATELY available on the connected mobile device, so you can directly test anything as you make it
- All the basic interactions and animations expected from modern mobile OS’s are available (pinching, swiping, bouncing scrolls…) and very easy to implement
- Very easy sharing of your prototypes as online links
- Support for Android Wear and Apple Watch
- Great online help from the developing team via their Community site
CONS:
- More advanced prototypes are not impossible, but certainly tricky to manage, and my experience so far has shown that the more assets and functionality you add to them, the slower the performance. Some animations which were smooth at the beginning, became choppy as the prototype became more complex.
- Some basic functionality still lacking, such as zooming (for pixel perfect alignment and so you can work on smaller screens)
- No “Save” button, so if you want to explore new ideas without breaking up your stable prototype, you better make a copy of it before you start
- No support for video or animations
- Still a bit buggy on Windows. Some functionality does not work (e.g. undo with Ctrl+Z keyboard shortcut)
For a nice and comprehensive review of different prototyping tools, I suggest you take a look at THIS excellent article and this FOLLOW-UP.